9 Tips to Getting Started and Having a Blast with Oculus Quest 2
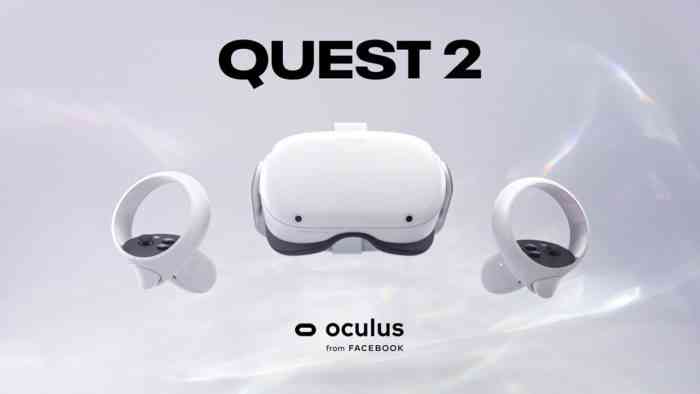
The Oculus Quest 2 is upon us and is one of the most impressive VR options to date. An entirely wireless experience, the Quest 2 requires no console or PC to run. It is an incredibly liberating experience and one I cannot wait to dive into further, but I’ve also been lucky enough to use VR before. Virtual Reality is impossible to describe, and the videos we see don’t do it justice for how engaging and truly real it becomes. If the Oculus Quest 2 is on your radar – which it really ought to be – it might seem more than a little daunting. I’m here to help you get adjusted to this whole new world and offer up 9 tips on how to get started and have a great time with your Oculus Quest 2.
1. Adjust Those Head Straps
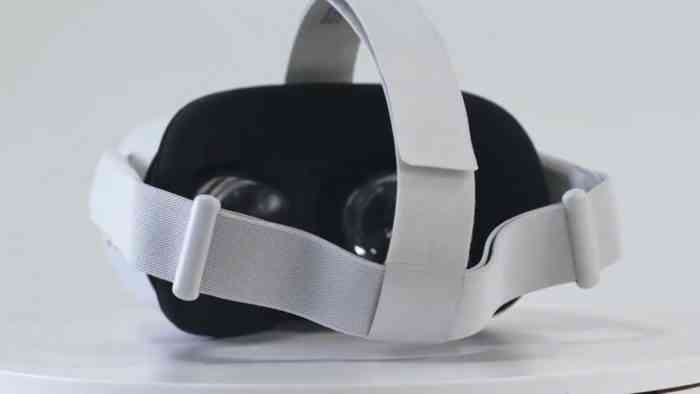
You’re going to be looking around inside VR so the last thing you want is that shiny new Quest 2 to fall off your face and hit the ground. The headset has two straps: the main band which wraps around your head and a secondary one that runs over the top. Loosen the top strap first and focus on getting it comfortable and snug around your head. The horizontal strap should sit just above your ears with the plastic-adjusting clips in the middle of the back of your head. The clips will slide to adjust the tension and get that perfect fit. It’s important to make this adjustment first because if you start with the top strap it might not sit safely on your head while making you think it’s nice and snug. Once the side strap is in place, the top one pulls through the front of the mask and sits neatly in place with Velcro. Once you’ve found your ideal setting you shouldn’t need to adjust it again unless someone else uses the Quest 2, in which case they should follow this same step.
2. Finding that Sweet Spot (With Your IPD)
Adjusting the straps to fit comfortably is important, but not all faces are the same! If the image seems to be a bit blurry it could be due to the IPD or Interpupillary Distance setting. This is the distance in millimeters between your pupils when facing forward. The Quest 2 comes with three settings: 58, 63, and 68 mm. You’ll want to take the headset off and adjust this setting by sliding the lens left or right and seeing which works best for you. Between the lenses will display a number so you know which setting is optimal for your eyes (Feel free to grab a ruler and a friend to find your precise IPD setting). You might also need to slide the device itself up or down a few mm to get that perfect clarity. This might require some minor tweaks to those straps but this fine-tuning is going to get you the absolute best experience with your VR.
3. Eyes up, Guardian Boundary
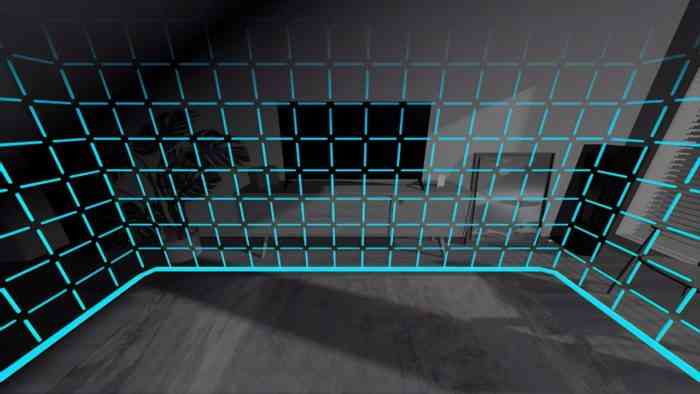
Safety is of the utmost importance in VR, and the Oculus Quest 2 features two truly fantastic Guardian Boundary settings as well as Passthrough +. As you go through the steps of setting up the Oculus Quest 2 for the first time you’ll be walked through the boundary settings. Stationary will create a cylinder around you when seated or standing still. It does so automatically and requires no effort. The other option, Roomscale, activates the external cameras letting you see the world around you. You’ll be prompted to set the height of the floor and then use the Touch controller to draw a border around your play space, building an invisible border. In both cases, if you reach beyond these limitations a grid comes into focus and turns red to let you know you are moving out of bounds. If you go too far, the Passthrough + function kicks in, activating the external cameras and letting you instead see the real world around you. These methods are both phenomenal and easy to use, often prompting you to pick one each time you boot up the headset. It’s best you take the time to get familiar with these options in the settings so you can play with peace of mind.
4. How the Heck Does This Work?
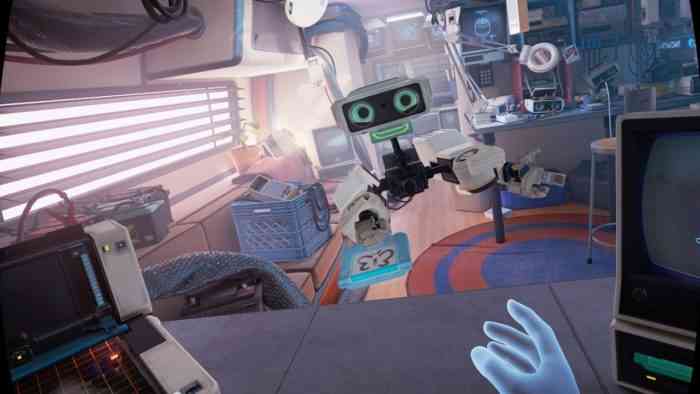
Any good console comes with a tech-demo to show off what it can do, and the Oculus Quest 2 is no different. My top three picks to try are First Steps, First Contact, and Elixir in that order. You’ll need to find them in the Oculus Store (which is very easy to navigate) and they will download in seconds. First Steps is best played seated while your brain adjusts to the new environment. It introduces you to the Touch controllers and how the core mechanics of VR works. You’ll stack blocks, fire rockets, shoot guns, and dance with an adorable robot. First Contact takes these mechanics and upscales the resolution and detail, showing off how gorgeous the textures of the Quest 2 can be. I found I had a better time playing this standing but it can also be played seated. Elixir is where the device really shines. You’ll need to install the Hands app, make sure you have plenty of space in Roomscale mode, and put down those Touch controllers. Elixir runs exclusively on hand movements tracked by the Quest 2’s cameras. While you won’t physically by walking around, you’ll naturally take a step or two, so make sure you have plenty of space to protect those toes!
5. TAKE A BREAK
I cannot stress this one enough. Even with several hours in VR and no history of motion sickness, it starts to get to me. Whether your head or your stomach, VR is an amazing sensation but one your body and mind aren’t used to. The previously mentioned demos are all the perfect amount of time to play one to completion and then take the headset off and give yourself a 10-15 minute break before diving back in. The Quest 2 has a battery life of 2-3 hours which is a blessing in disguise as you can’t play for too long without needing a charge. I know video game companies always advise taking a break but this is a whole other level when you’ve been sitting still but your brain think’s you’ve just run a marathon while shooting at robots. Give yourself a break and you’ll be able to play more in the long run.
6. Check out the Demos
Once you’ve got the hang of the previous demos it’s time to dive in and see what other options are available. Oculus Quest 2 comes with a wide range of available free demos including Superhot, Beat Saber, Space Pirate Trainer, and Journey of the Gods to name a few. Load up on demos and see what your Quest 2 has to offer. My three personal favorite demos are Bogo, Space Pirate Trainer, and Journey of the Gods. Bogo is a virtual pet simulator where you pet, feed and play with a large dinosaur-like creature. Space Pirate Trainer is a stationary 360 shooter with some incredible details, and Journey of the Gods is a simple yet colorful and compelling fantasy adventure akin to the Legend of Zelda series. Games on the Quest 2 are surprisingly inexpensive – particularly compared to modern gaming prices – but if you aren’t ready to buy, these free demos will give you plenty of replayability while helping you zero in on the kind of games you want to play.
7. I Like the Way you Move
Motion sickness and nausea are at the forefront of concerns when getting into VR gaming. To combat these issues, many games are preset to snap-camera and teleportation locomotion settings. Rather than running or looking around with the thumbsticks as in regular video games, you instead point and teleport to a location. Flicking the right stick makes your view jump a preset degree in that direction rather than smooth movement. Most games feature customization options so you can find the right setting for your style. I personally prefer the smooth locomotion of classic gaming, however certain games still manage to get to me and make me feel uneasy. Before booting up a game you should check the settings and find what works best for you, even if that means frequently pausing and unpausing the game.
8. There’s an App for That
The Oculus Quest 2 not only has a store accessible from within the headset, but you’ll also want the Oculus app when you set up the headset for the first time. This not only informs you of updates, sales, and new content, but it lets you access the store without having to boot up the unit itself. Want to browse your library? Buy a game that’s been on your mind? Not only do you get easy access to the full library of games and features, you can also use the app to access the Oculus Go and Oculus Rift stores. Why would you want access to those? With the Oculus Link cable or other approved connection, you can plug the Quest 2 into your PC and use it to play games from the Rift store or even Steam VR.
9. Please, Take Care of Yourself!
Taking regular breaks is vital, but you need to do more than just having a breather. VR is incredibly fun and I guarantee you’ll be working up a sweat without even realizing it. These games are intense, immersive, beautiful, and engaging. The graphical output is impressive, and the more you use it the more it’s going to take out of you. Be sure to hydrate before, after, and during play. Eat something healthy before you dive in (chips and snacks will NOT do you any favors!) VR is going to be demanding on you so just like a fresh pair of batteries in a controller, you want to be at full capacity to get the most out of your playtime.

If you follow these steps you’ll come out the other side an absolute master at VR. The world will literally be in your hands, regardless of which world that is. This list is to make sure you are comfortable, safe, and having fun with that amazing new machine strapped to your face and I hope you have as much fun with it as I have with mine. Be sure to keep an eye out for our in-depth look at the Oculus Quest 2 coming soon.