Die Less with These Tips
Do you ever play a game’s tutorial, all the while thinking, ok, ok, just let me get to the good stuff? Yeah, me too. Players coming from Housemarque’s Returnal to their new game, Saros, might think they already have a handle on it. Bullet hell, got it. Colored projectiles, check. Die, start over, inch forward.
Either I wasn’t paying attention (quite likely) or Saros‘ tutorial fails to explain quite a few mechanics. It took me more than a few runs to figure them out. These might be obvious, but I’m willing to bet impatient players will miss at least one of them.
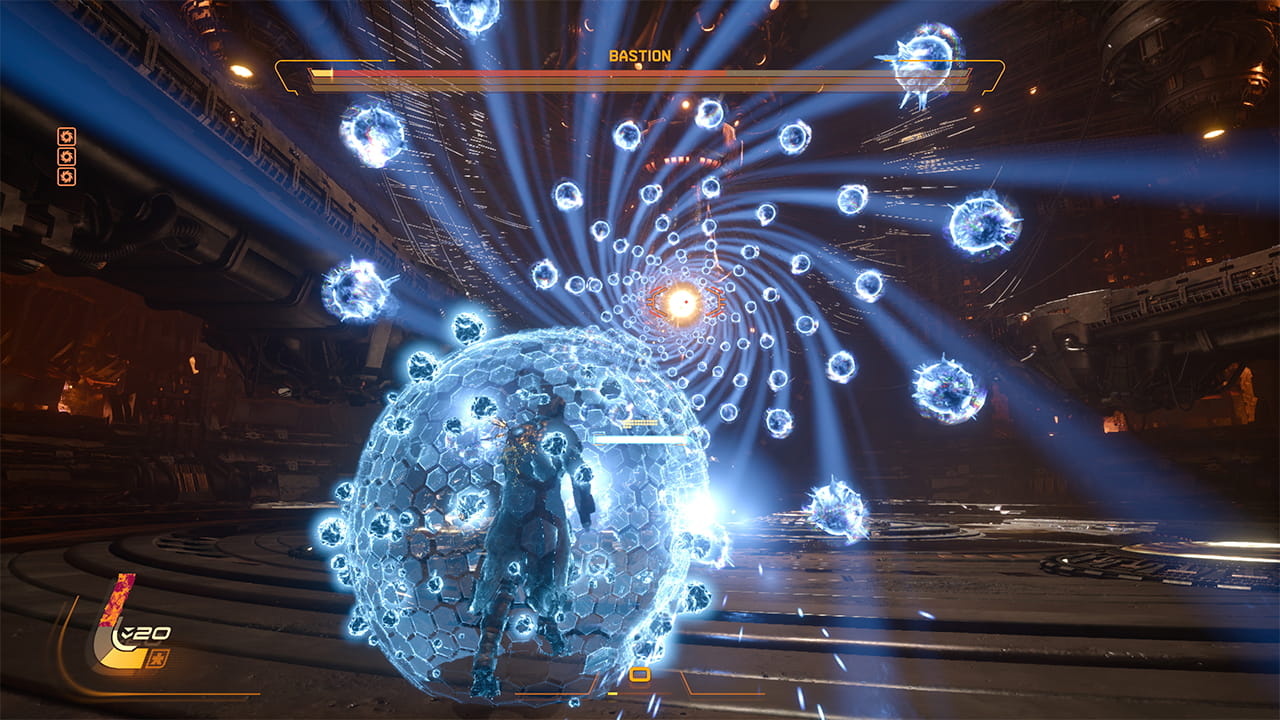
1 All Those Projectile Colors Mean Something
Just like in Returnal, battles in Saros are a chaotic mix of weapon effects and colorful projectiles honing in on you. The tutorial explains that you can dash through them, but that’s only a small part of your toolkit. Blue particles can be dashed through, but they should also be absorbed by your shield to trigger your Power Weapon. Yellow particles can be dashed through or absorbed, but doing so adds a max health-draining status effect called Corruption. Red particles have to be dodged, though later in the game, you can parry them. Red beams must be dodged or jumped over. The game’s first boss is a test of your understanding of these mechanics.
2 Don’t Save Your Power Weapon
You learn it in the tutorial, but don’t forget your Power Shot, triggered by holding down L2 fully and firing with R2. It’s devastating against lower-level enemies and for crowd control, and a must-use in boss fights. However, the alt fire for your weapon comes from holding L2 halfway down, and in the heat of battle, it’s sometimes tricky to mistake one for the other.
3 A Rush of Adrenaline
No-hit runs aren’t just for bragging rights on Twitch streams. In Saros, the longer you avoid getting hit, the faster your Adrenaline meter fills, from level 1 to 5. Each level comes with a perk. For example, you get a melee boost at level 3 and a power boost at level 5. Get hit and the meter resets. But like literally every risk/reward tactic in Saros, avoiding getting hit means playing defensively, which makes it harder to build up that Power Weapon.
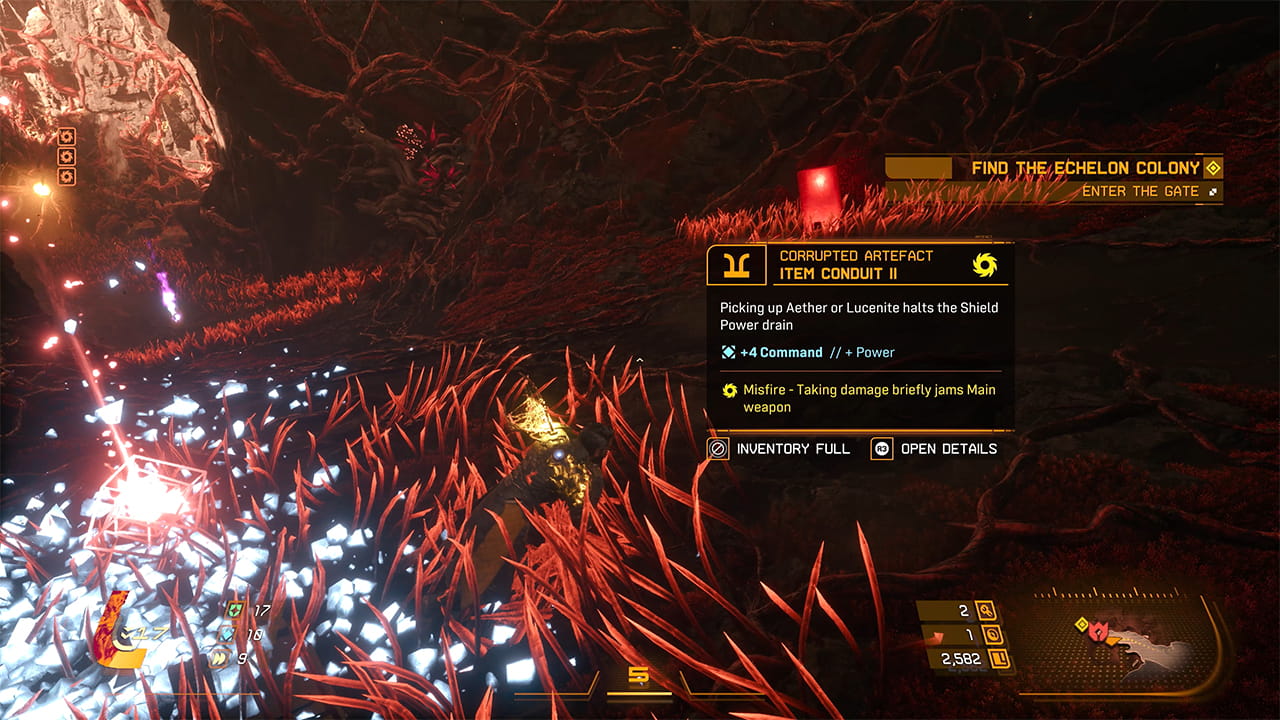
4 Skill Tree Made Simple
The skill tree in Saros is refreshingly simple. There are three Attributes: Resilience: Increases maximum Armour Integrity (health), Command: Increases the maximum amount of Power, and Drive: Increases the rate at which your Proficiency level grows from collecting Lucenite. Improving these stats is the key to improving your survivability and lethal power on each successive run. At least in the early game (up through the first boss), it’s probably a good idea to upgrade everything equally. The first really important node on the Attribute tree is Second Chance, which is a permanent unlock that gives you a full-health revival during each run.
5 Weapons Scale With Attributes
In the early game, you often find a weapon, and it has a higher Proficiency level than the one you’re holding, so you take it. But later, you’ll want to be a little more circumspect, take a breath, and check out a weapon’s scaling to see how it aligns with your stats.
There are a lot of other things to learn in Saros, like using the mini-map to your advantage, how to use pickups efficiently, and mastering the Perfect Reload. They’ll come in time. Saros does a great job of hiding its learning curve in the just-one-more-run, addictive gameplay loop. Both accessible and deep, Saros is definitely one of the best action games of the year.