Dead Rising 4 Tips & Tricks
Dead Rising 4 is not an overly difficult game, in fact, according to my “Game Summary” (after I finished the game), I only died three times. Despite this, there is a lot going on in Dead Rising 4 and it’s easy to miss stuff. Heck, I’m confident I’ll probably discover brand new things on my next playthrough! But for now, I’m here to provide you a few useful tips & tricks I discovered during my time with Dead Rising 4. Do you have any tips or tricks for new Dead Rising 4 players? Let us know in the comments section (just try and avoid any big spoilers!).

C-C-C-Combo!! Achievement
This Achievement requires you to “Get a Hit Streak over 200 then use a Skill Move”. The Hit Streak counter pops up when you start attacking zombies and the Skill Move is preformed by pressing Y+B at the same time when prompted (the prompt is right beside the Hit Streak counter).
Tip: This one’s super easy to get in Case 3 during the “Tracking the Signal” mission when you’re tasked with escaping the gated community. After you complete all the objectives leading up to the escape, you’ll be given an Exo Suit. In the same room as the Exo Suit is a Slush Machine which you can use to enhance your Exo Suit. This gives you an unlimited ammo “snow ball” machine and a Skill Move that creates a freezing storm. As soon as you leave the house, you’ll be faced with vast amounts of zombies – and this is where I used the Slush Machine enhanced Exo Suit to rack up my Hit Counter (I was able to rack my counter well past 1000 hits!). However, all you need to do is earn 200 hits and then as soon as your prompted to, use the Skill Move. The Skill Move becomes available after a predetermined number of hits (which will depend on which abilities you’ve unlocked).

Fashionista Achievement
To earn this Achievement, you just need to try on 100 different clothing items – and the easiest way to do that is just try on clothes whenever and wherever you find them. Eventually, it’ll happen (for me, it was one of the last Achievements I earned before beating the game).
Tip: If you’ve put on a piece of clothing that you’re not too impressed with, you can just press the B button on that same piece of clothing and it’ll revert you back to what you were wearing before. Another way to change outfits is by pressing B whenever you’re looking at a tall mirror (this will bring up a menu that allows you to change into any piece of clothing you’ve tried on before!).

New Game Plus?
While not officially named “New Game Plus”, if you start a New Game after completing the game, you’ll start at the same level you finished the game at with all of your abilities unlocked (you will, however, lose all the items you had on you at the time). Alternatively, you can pick any one of the seven Cases and start directly from there. This is perfect if you’re like me and just want to focus on the story during the first playthrough, then use the second playthrough to collect everything!
Tip: Near the end of Case 5, you’ll be prompted that this is the point of no return, and that you won’t be able to explore after that point. Keep this in mind if you have more collectibles you want to find during your current playthrough. Case 6 does NOT allow you to explore at all.
Also, I’d suggest you have as many health items as you can possibly carry when you hit that point of no return at the end of Case 5…
Exposing Barclay’s Secrets the Easy Way (End of Case 3)
Tip: In the final fight of Case 3, you’ll go up against a bunch of Evolved Zombies and some standard Zombies. I discovered this fun little glitch that might provide you a little help if those Evolved Zombies are causing too much hassle. As soon as the fight begins, run back towards the door you originally entered. While you can’t go in the door (yet), you can stand in the hallway. For some reason, the Evolved Zombies refused to come down the hallway, they just kept running back and forth in the main fight area. Since the objective is to survive for a specific amount of time, I was able to just stand there and wait for the timer to count down. Near the end of the battle, a couple of the standard Zombies finally shuffled towards me, but I was able to dispatch of them quite easily.

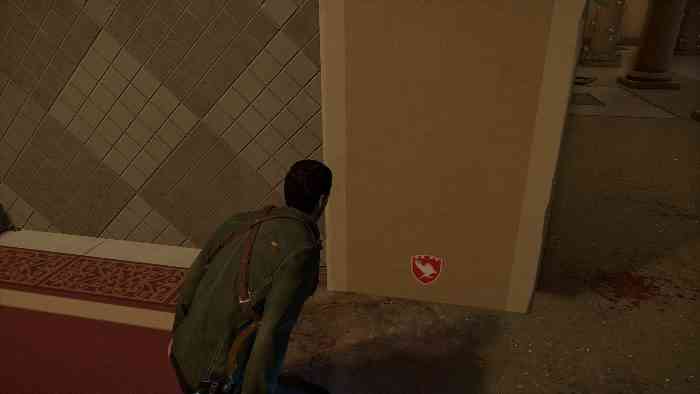
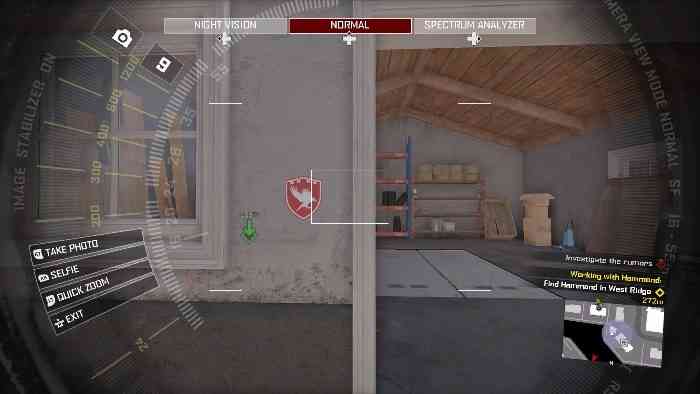
Safe Rooms
There are safe rooms all over Willamette, and almost all of them provide health and combo weapons. The easiest way to find them is to keep an eye out for the red “shield” shaped symbol with a white bird inside (see picture). Now, finding the symbol is only the first of four steps! You’ll also need to find the keycard to access the safe room, then you’ll need to find the panel to scan the keycard, and finally you’ll need to locate the safe room entrance. In my experience, all four of these elements were within small area of each other.
For example: I came across a garage with the safe room symbol on it, and notice the floor of the garage appeared to be two doors. I then went inside the house across the yard and found the keycard in there. I returned to the garage and found the panel on one of the walls. This is a typical example of accessing the safe rooms.
Tip: Sometimes, the access panels will be hidden and require you to use the Spectrum Analyzer to find them.